- C# Fundamentals Tutorial
- C# - Intro
- C# - Installation
- C# - Basic Syntax
- C# - Variables
- C# - Data Types
- C# - Operators
- C# - Type Conversion
- C# - Arrays
- C# - Strings
- C# - Methods
- C# - Classes
- C# - If..Else
- C# - Loops
- C# - Enums
- C# - Inheritance
- C# - Encapsulation
- C# - Polymorphism
- C# - Operator Overloading
- C# - Interfaces
- C# - Regular Expressions
- C# - Exception Handling
- Interview Materials
- C# Interview Questions
- MVC Interview Questions
C# - Installation
IDE (Integrated Development Environment)
An IDE is a feature-rich program that supports many aspects of software development. It allows you write your code, edit, debug, run your application and publish your app on server.
In our learning we will use Visual Studio Community version to write our C# code. Community version is free and you can download it from https://visualstudio.microsoft.com/vs/community/
Installation
Once you download and installed the Visual Studio Installer, Choose required .NET workloads to get started.

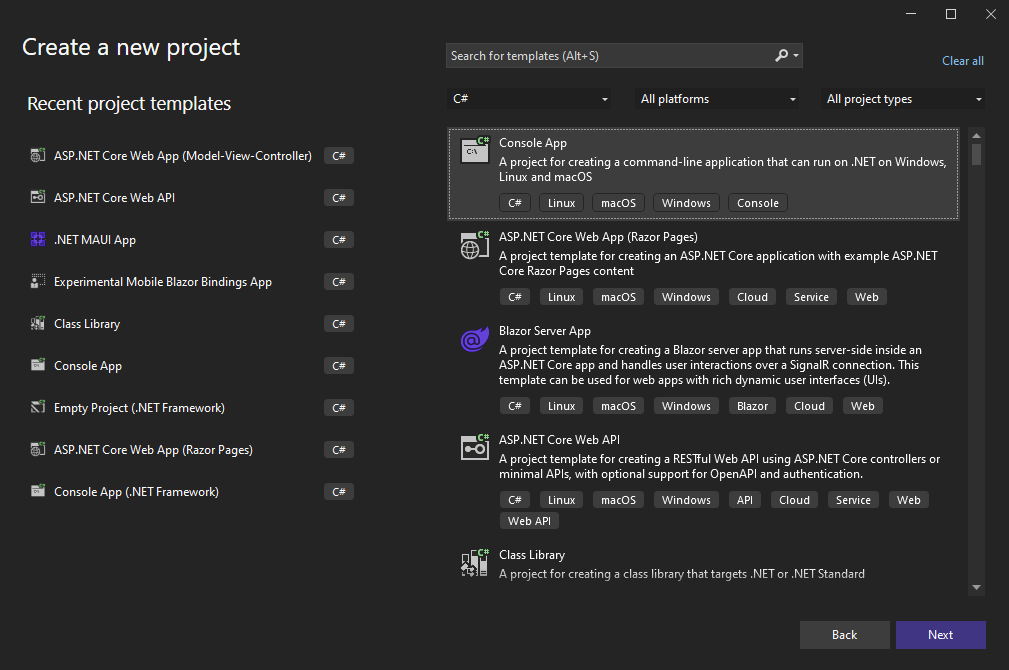
Create a New Project
Now, its time to create our first application. Open your installed Visual Studio Community and select Console Application to create a new project.

After creating project, you will see automatic generated code as below.
using System;
class Program
{
    static void Main()
    {
        Console.WriteLine("Hello, World!");
    }
}
No worries, If you are not able to understand the code. We still have long path to run.
To run your first application, Press F5 button on your keyboard or you can use your IDE menu option at top (Click Debug -> Start Debugging ).
Congratulations! You have executed your first C# application by your own.